Wednesday, 2 November 2016

School Holiday vs Christmas

Ho ho ho~

I know i know, it is not Christmas yet but I can feel the excitement of celebrating the season of greeting already!

How's everyone after Halloween? 

I apologize for "abandoning" this blog for quite some time due to some unforeseen circumstances. But not anymore! I am back with full energy and recharged, and ready to share more useful DIY fun play activities with you. Do stay tune!

In Malaysia, we have our long school holiday which is similar to summer school holiday in Western country. And this year, our school holiday falls on 26 November 2016 onward till the 2nd January 2017. 

Any activities or plans with your kids during the school holidays? Not just the homework and non-top talent classes eh?

You may refer to our blog here to give you some ideas on DIY projects that can be done easily with your kids during the weekends or coming school holiday.

Perhaps, I am working on something "big" for coming Christmas. I will be back real soon and stay tune ya.

Have a great day!

Friday, 26 August 2016

Oops, We were just away for better stuff!


Hi all, how's everyone doing? Seems like our blog is a bit quiet and dusty... (no~~~)

Definitely not!

We were just away to bring in more exciting stuff for the readers! =D

Catch us on our facebook page and facebook shop for more details today!

Learn & play with NewGen Xplorer today!

Friday, 15 July 2016

Colouring

COLOURING

This is a fun, simple and inexpensive activity that helps children to develop cognitively, psychologically and creatively. It is truly an amazing experience watch children develop as they grow!

(Start children colouring from young)

Most children love to colour and as it turns out, it’s more than just a recreational activity (for those who don’t, a little encouragement may go a long way). It can also foster physical and psychological development in a range of areas. Get your child started with colouring as early as possible and you’ll contribute to a lifetime of positive benefits.

Here are some of the key benefits of colouring for children:


Motor Skills - The act of colouring can help to develop and improve motor skills in young children. The actions, motions and precise grip involved in colouring can aid in the development of the muscles of the fingers, hands and wrist. Fine motor skill development can help children write more skilfully as well as manipulate small objects. They can then build on these skills to become better at other activities such as in sports.


Contributes to Better Handwriting - Dexterity, hand strength and attention to detail are all required to write. Starting out with colouring pages early can help to develop these qualities so that writing comes more easily and naturally.

Prepares Children for School - Children’s education takes place in a classroom with a fair amount of structure. Lessons are issued on paper via assignments, tests and other written course work. Colouring sheets, books and pages can be integral in preparing kids for the more structured work on paper ahead of them.

(Colouring using glitter glue)

(Finished products using water colour pencils)

Stimulates Creativity - Whether they stay in the lines or not, colouring fosters a creative spirit and an appreciation for visual differences. Colouring can encourage the imagination and inspire children to brainstorm and learn to think of new ideas on their own naturally.

(Half way colouring the colourful butterflies)

Colour Awareness, Recognition and Discernment - The names and hues of colours must be learned, and colouring on colouring pages fosters practice and awareness of primary and secondary colours.


Boundaries - Colouring sheets can help with anchoring a sense of structure and the need and benefit of having boundaries. Colouring also helps children to learn about lines, shapes, colours/hues, perspective, patterns and forms.


Improved Focus and Hand to Eye Coordination - Coordination and the ability to focus is just developing in young children, and undertaking activities to foster and strengthen this budding talent assists in efficient, healthy development. The act of holding crayons/colour pencils, choosing colours, implementing the colour in the ideal spot and even sharpening colour pencils can all help with cultivating strong hand-eye coordination in children.


Improved Confidence and Self Esteem - The ability to complete a task successfully builds self-esteem and confidence in young children. Colouring regularly and completing projects boosts a child’s sense of accomplishment and pride in themselves. 

Self-Expression - Every child expresses themselves differently, and many children are visual in nature. Colouring is a vehicle for self-expression as children can make colour decisions.


Therapy and Stress Relief - Colouring is also calming and therapeutic for children (even for adults), especially if they have no other outlet for unpleasant or confusing emotions. 

-Some photo sharing below for the finished products-

(Colouring content between mummy and baby)

(Colouring content between mummy and baby)

(Colouring content between mummy and baby)

(Finished product)

(Finished product)

Have fun and learning through play!

by NewGen Xplorer

Friday, 24 June 2016

Weekend Project-->Homemade Lava Lamp

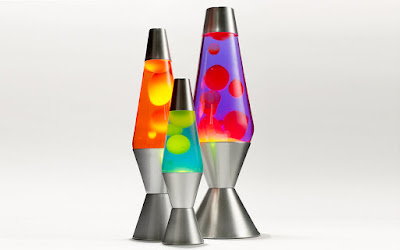
Remember this? The Lava Lamp. Well this Lava Lamp is made out of wax and uses heat to keep the “lava” going.

We are going to try to make a much simpler version of the Lava Lamp with readily available household items.

It’s really easy to do and it’s fun! Try it!

Step 1

Preparing your material. All you need is:-
  • Clear tall glass or clear container
  • Vegetable oil or olive oil
  • Water
  • Food colouring or water colours (if you would like to colour it)
  • Regular salt or fruit salt (Eno)
  • For the light effect: Use a torch light or a see through large container with a light below
(3/ 4 water added without colouring)

(3/ 4 water added with colouring)


Step 2
Fill the glass container with 3 / 4 water and then you can add in the food colouring.


Step 3

You then add in 1 / 4 oil. You will see that the oil will settle on the top.

(Salt added in without lighting effect)

(Salt added in with lighting effect)


Step 4

Get your torch light or lighting ready. Place your container on the lighting or get someone to help you shine the torch light on your container.


(Lava Lamp with  regular salt)

(Lava Lamp with  fruit salt)


Step 5

Slowly add in the salt. You will see the lava lamp effect. The bubbling does not last for very long. You will have to keep adding in the salt.


OR Alternatively...


Fill the glass the 1 / 4 water and 3 / 4 oil. Put in the colouring after the oil. Add in fruit salt, you would see the bubbly action go on for much longer depending on how much fruit salt you put in. Do not put too much fruit salt. A little at a time for the best effect!


(Hold a torch light and watch your lava lamp)

Do you observe any differences?

Congratulations you have your very own home made lava lamp!! =D

*** *** ***
Learning outcome:

· You can get your child involved in the preparation and process and thereafter involved in the cleaning up after. It’s never too early to instil these qualities in them.

· Teaches vocabulary and math skill e.g. Handling and talking about the properties of the materials (dry, wet, liquid, oily). Measuring exactly takes practice.

· It helps children follow the procedures for safety

· It also teaches children the importance of the order in which materials are mixed how it may affect the product. 

· Also teaches them to make observations when materials are put in in different orders.

· Children can practice self-control especially when there will be the urge for them to get their hands on everything. 

· Mixing materials together can make a change—a material may get wet, clump together, or dissolve. 

· Heat can transform materials into a material with new properties. 

· Experiments generate the curiosity in children and encourages them to want to know more. 

1) Why does the oil float on the water? 

Oil floats on water because a drop of oil is lighter than a drop of water. Another way of saying this is to say that water is denser than oil. Density is a measurement of how much a given volume of something weighs. Things that are less dense than water will float in water. Things that are more dense than water will sink. 

Even though oil and water are both liquids, they are what chemists call immiscible liquids. That's a fancy word that means they don't mix.

2) What happens when salt is put on the oil? 

Salt is heavier than water, so when you pour salt on the oil, it sinks to the bottom of the mixture, carrying a blob of oil with it. In the water, the salt starts to dissolve. As it dissolves, the salt releases the oil, which floats back up to the top of the water.

3) So this is how the Lava Lamp made out of wax works?

Like your oil and water, the "lava" in a Lava Lamp doesn't mix with the liquid that surrounds it. When it's cool, the "lava" is a little bit denser than the liquid surrounding it. When the "lava" rests on the bottom of the Lava Lamp, the light bulb in the lamp warms it up. As it warms up, the "lava" expands a little. When it expands, the "lava" stays the same weight but it takes up more space-so it's less dense. When it's warm enough, the "lava" is less dense than the surrounding liquid, and so it rises up to the top to float. At the top of the lamp, it cools down, becomes more dense, and sinks once again. This cycle repeats over and over as the "lava" warms up and rises, then cools down and sinks. 

*** *** ***

Tips:-

1) Once the oil has settled you can use a baster to take out the oil for recycling for your next experiment.

2) During cleaning process, please ensure proper disposal of the non-recycled items to avoid clogging of your sink.

*** *** ***
Happy Learning through play!! 

Weekend Project-->Home Lava Lamp

Remember this? The Lava Lamp. Well this Lava Lamp is made out of wax and uses heat to keep the “lava” going.

We are going to try to make a much simpler version of the Lava Lamp with readily available household items.

It’s really easy to do and it’s fun! Try it!

Step 1

Preparing your material. All you need is:-
  • Clear tall glass or clear container
  • Vegetable oil or olive oil
  • Water
  • Food colouring or water colours (if you would like to colour it)
  • Regular salt or fruit salt (Eno)
  • For the light effect: Use a torch light or a see through large container with a light below
(3/ 4 water added without colouring)

(3/ 4 water added with colouring)


Step 2
Fill the glass container with 3 / 4 water and then you can add in the food colouring.


Step 3

You then add in 1 / 4 oil. You will see that the oil will settle on the top.

(Salt added in without lighting effect)

(Salt added in with lighting effect)


Step 4

Get your torch light or lighting ready. Place your container on the lighting or get someone to help you shine the torch light on your container.


(Lava Lamp with  regular salt)

(Lava Lamp with  fruit salt)


Step 5

Slowly add in the salt. You will see the lava lamp effect. The bubbling does not last for very long. You will have to keep adding in the salt.


OR Alternatively...


Fill the glass the 1 / 4 water and 3 / 4 oil. Put in the colouring after the oil. Add in fruit salt, you would see the bubbly action go on for much longer depending on how much fruit salt you put in. Do not put too much fruit salt. A little at a time for the best effect!


(Hold a torch light and watch your lava lamp)

Do you observe any differences?

Congratulations you have your very own home made lava lamp!! =D

*** *** ***
Learning outcome:

· You can get your child involved in the preparation and process and thereafter involved in the cleaning up after. It’s never too early to instil these qualities in them.

· Teaches vocabulary and math skill e.g. Handling and talking about the properties of the materials (dry, wet, liquid, oily). Measuring exactly takes practice.

· It helps children follow the procedures for safety

· It also teaches children the importance of the order in which materials are mixed how it may affect the product. 

· Also teaches them to make observations when materials are put in in different orders.

· Children can practice self-control especially when there will be the urge for them to get their hands on everything. 

· Mixing materials together can make a change—a material may get wet, clump together, or dissolve. 

· Heat can transform materials into a material with new properties. 

· Experiments generate the curiosity in children and encourages them to want to know more. 

1) Why does the oil float on the water? 

Oil floats on water because a drop of oil is lighter than a drop of water. Another way of saying this is to say that water is denser than oil. Density is a measurement of how much a given volume of something weighs. Things that are less dense than water will float in water. Things that are more dense than water will sink. 

Even though oil and water are both liquids, they are what chemists call immiscible liquids. That's a fancy word that means they don't mix.

2) What happens when salt is put on the oil? 

Salt is heavier than water, so when you pour salt on the oil, it sinks to the bottom of the mixture, carrying a blob of oil with it. In the water, the salt starts to dissolve. As it dissolves, the salt releases the oil, which floats back up to the top of the water.

3) So this is how the Lava Lamp made out of wax works?

Like your oil and water, the "lava" in a Lava Lamp doesn't mix with the liquid that surrounds it. When it's cool, the "lava" is a little bit denser than the liquid surrounding it. When the "lava" rests on the bottom of the Lava Lamp, the light bulb in the lamp warms it up. As it warms up, the "lava" expands a little. When it expands, the "lava" stays the same weight but it takes up more space-so it's less dense. When it's warm enough, the "lava" is less dense than the surrounding liquid, and so it rises up to the top to float. At the top of the lamp, it cools down, becomes more dense, and sinks once again. This cycle repeats over and over as the "lava" warms up and rises, then cools down and sinks. 

*** *** ***
Happy Learning through play!! 

Saturday, 18 June 2016

Weekend Project-->Making your own Playdough


Hi all, weekend is here again! Let's have a fun weekend by making your own playdough! =)

*** *** ***

HOW TO MAKE YOUR OWN PLAY DOUGH?


INGREDIENTS:-

i) 2 to 3 cups of plain flour

ii) 3 / 4 cup of salt

iii) 1 tablespoon vegetable oil

iv) 1 cup of water

v) 1 teaspoon of food colouring

*** *** ***

STEPS:-

1. Add the salt and flour into a mixing bowl. You can use 2 cups of flour first. You can work on the consistency later.


2. Make a hole in the centre of the salt and flour mixture for easy mixing.

3. Add in the oil.


4. Next add in the water a little at a time in the centre and mix until all the ingredients are smooth.

5. You can add in the balance of the flour a little at a time and knead the dough.

6. If the dough is too wet it will be too soft or may be sticky. You can adjust the consistency to your liking.


7. Now you can divide the dough into a few portions and begin to colour them using food colouring. Remember food colouring stains. You can use gloves and line the table with paper beforehand. Alternatively you can use water colours although the effect may not be the same.


8. You could choose to use glitter or anything else to make it more attractive.

9. To store, simply roll the dough into small balls and keep in plastic bags or a container!

*** *** ***
BENEFITS OF MAKING YOUR OWN PLAY DOUGH:-


*You are guaranteed that the play dough is non-toxic

*You can get your child involved in the process of cleaning up after. It’s never too early to instil these qualities in them. 

*Teaches vocabulary and math skill e.g. Handling and talking about the properties of the materials (dry, wet, liquid, powdery, oily). Measuring exactly takes practice. 

*It helps children follow the procedures for safety

*It also teaches children the importance of the order in which materials are mixed how it may affect the product. 

*Children can practice self-control especially when there will be the urge for them to get their hands on everything. 

*Mixing materials together can make a change—a material may get wet, clump together, or dissolve. 

*Heat can transform materials into a material with new properties. 


*After making the play dough - during play; children use their imagination, practice social skills, develop language skills, continue to explore the properties of the new material, and express themselves artistically.

*Play dough is easy to make with children because there is some “flexibility” in the amounts—a little more water will make softer dough, a little less oil will make it a bit sticky. Recipes for play dough (a valuable learning tool). 

*** *** ***

Have fun learning through Play!!

Friday, 27 May 2016

"Project" for the Weekend-->Mixing Colours

Children find this to be a fun way of learning and remembering the colour mixes. You can even use this opportunity to use flash cards so they can learn to spell the colours.

Step 1


All you need is a tray, a few transparent cupswater colours and some water. You could use food colouring however they may stain your floors of furniture. Start with the 3 primary colours – redyellow and blue. Let your child put the water colours in water and mix it.


Preparation of colour mixing project

(Left to Right) The 3 primary colours, Yellow, Blue & Red

Step 2


Teach them how to mix the colours to get the secondary colours. Let your child do the mixing. For example:


Blue + Yellow = Green


Blue + Red = Purple

Yellow + Red = Orange


The primary colour mixing chart for easy reference.


Step 3 


Once you are done with the basics, you can add on for example; white and start mixing the colours again. 


Colour chart for parents' reference :) 


You can also experiment with paint as well. It is so much better than just telling your child the colour mixes verbally. Let them have the experience first-hand! It’s so much fun and they learn so much faster. 

Simple & fun colour mixing project can be easily carried out at home. Let's try out on this weekend!


Have a good weekend everyone! *in advance ^_^